How to Replace Roof Shingles: An Overview
In this article we’ll provide a guide on how to replace roof shingles. When you’re looking to replace shingles, you have a few options. It’s important to know what your home is made of before you start researching the right shingle for your needs. For example if it’s a brick house then metal roofing or rubber roofing is the best option. You also want to consider the size and shape of your home when making your decision. The most popular type of shingles are asphalt, which are made from a mixture of gravel, sand and bitumen. They’re affordable and easy to install, but they don’t last as long as other types of shingles. Metal roofing is more expensive, but it’s also more durable and can last up to 50 years. Rubber roofing is the most expensive option, but it’s also the most durable and can last up to 100 years. When you’re ready to replace shingles, be sure to follow these steps:
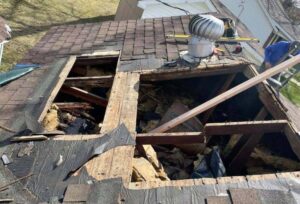
- Remove the old shingles. You’ll need a pry bar and a hammer for this step. Start at the bottom edge of the shingle and work your way up. Be careful not to damage the underlying roofing material.
- Clean the area where the new shingles will be installed. Use a power washer to remove any dirt, debris or moss. This step is important to ensure a good bond between the old and new shingles.
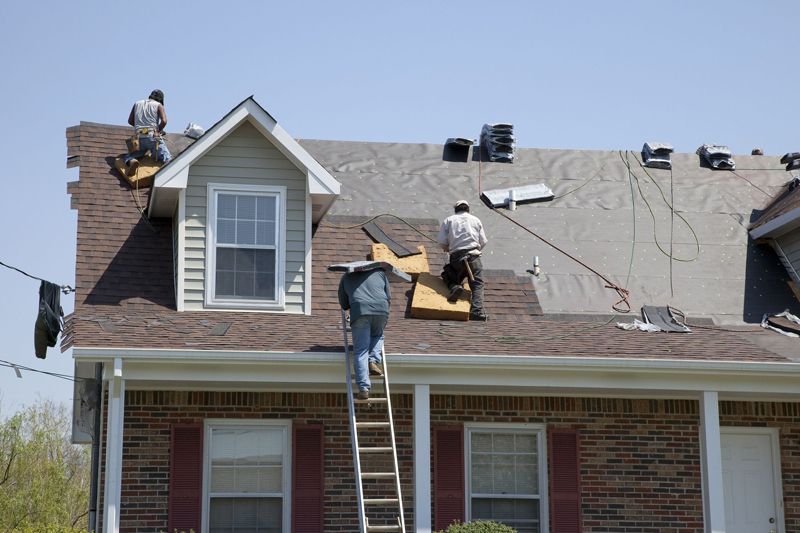
- Install the new shingles. Start at the bottom edge of the roof and work your way up. Be sure to overlap each shingle by at least 2 inches (5 cm).
- Secure the shingles. Space them about 6 inches (15 cm) apart along the edge of each shingle. Use galvanized nails or roofing screws to secure the shingles in place. Be sure to drive the nails or screws into the solid part of the shingle, not the edge.
- Seal the edges of the shingles with asphalt cement or roofing tar. Use a caulk gun to apply a bead of roofing sealant along the edges of the shingles. This will help prevent wind and water damage.
- Install a drip edge along the lower edge of the roof. This is a metal strip that helps prevent water from seeping under the shingles.
- Cover the nails or staples with asphalt roofing cement or roofing tar. Use a putty knife to apply a generous amount of roofing sealant over the nails or staples. This will help prevent leaks and prevent them from rusting.
- Inspect your work and make sure that all of the shingles are properly installed and sealed. If you have any questions, consult a professional roofer for assistance.
- Enjoy your new shingles! They should last for many years with proper care and maintenance.
Replacing shingles is a big job, but it’s one that you can do yourself if you’re feeling handy. Be sure to do your research and choose the right type of shingle for your needs. And always put safety first when working on your roof.
Use these steps as a guide when you’re ready to replace shingles on your home. With a little bit of effort, you can do it yourself and save money in the process. Be sure to follow all safety precautions when working on your roof. And if you have any questions, be sure to ask a professional for help.
https://www.google.com/maps?cid=4642085964654768550