The Basics of Roof Diagram
A roof diagram is a basic plan of a roof, typically drawn to scale, that shows the outline of the roof, the location and size of all dormers, hips, ridges, and valleys, and the eaves and gables. Roof diagrams are used by architects, builders, and homeowners to visualize how a roof will look and to communicate with contractors about the roof design.
There are a few basic elements that all roof diagrams include:
The outline of the roof:
This is generally the first thing that you will notice on a roof diagram. It includes the shape and size of the roof, as well as the location of any dormers, hips, ridges, and valleys. This information is important for understanding the overall layout of the roof and how it will interact with the rest of the house.
The eaves and gables:
These are the edges of the roof that extend beyond the outline of the roof. They are important for both aesthetic and functional purposes. The eaves help to protect the walls of the house from weather damage, while the gables add structural support to the roof.
The size and location of dormers, hips, ridges, and valleys:
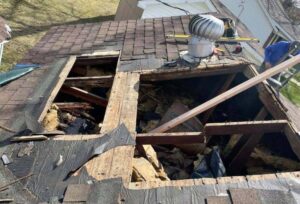
Dormers are small windows that project from the slope of the roof. They are often used for ventilation or to add light into a space. Hips are occur where two sloping sides of the roof meet, forming a triangle. Ridges are the highest point on the roof, running along the length of the roof. Valleys are the low points on the roof, formed where two sloping sides of the roof meet. This information is important for understanding how water will flow off of the roof and for visualizing the overall aesthetic of the roof.
The scale:
Roof diagrams are typically drawn to scale, which means that they are an accurate representation of the size and proportions of the roof. This is important for understanding how the roof will look in relation to the rest of the house.
Roof diagrams are a valuable tool for architects, builders, and homeowners alike. They help to visualize the roof design and to communicate with roofing contractors about the roof layout. When used correctly, they can save time and money by avoiding costly mistakes.
Ways to Create Roof Diagram
Once you have a basic understanding of these elements, you can start to create your own roof diagrams. There are a few different ways to do this:
- Use a ruler and pencil to draw the outline of the roof on graph paper. Then, use a compass or other circular object to draw in the location of all openings. Finally, add the eaves and gables.
- Use a roof design software program to create a digital roof diagram. This can be a great option if you want to experiment with different roof designs or share your diagram with others.
- Hire an architect or contractor to create a professional roof diagram for you. This is the best option if you are planning a major renovation or building a new home.
Once you have created your roof diagram, you can use it to communicate your roof design to contractors, get estimates for materials and labor, and visualize how the final product will look. Roof diagrams are an essential tool for anyone planning a roofing project.
https://www.google.com/maps?cid=4642085964654768550